Tuesday, April 10, 2012

Vintage Sabatier Refurb

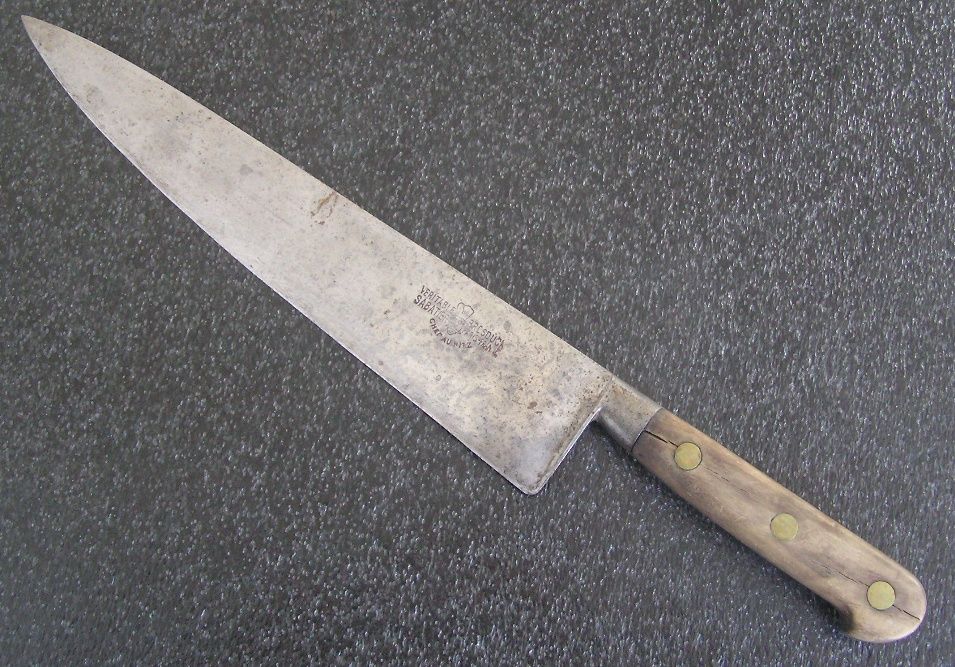
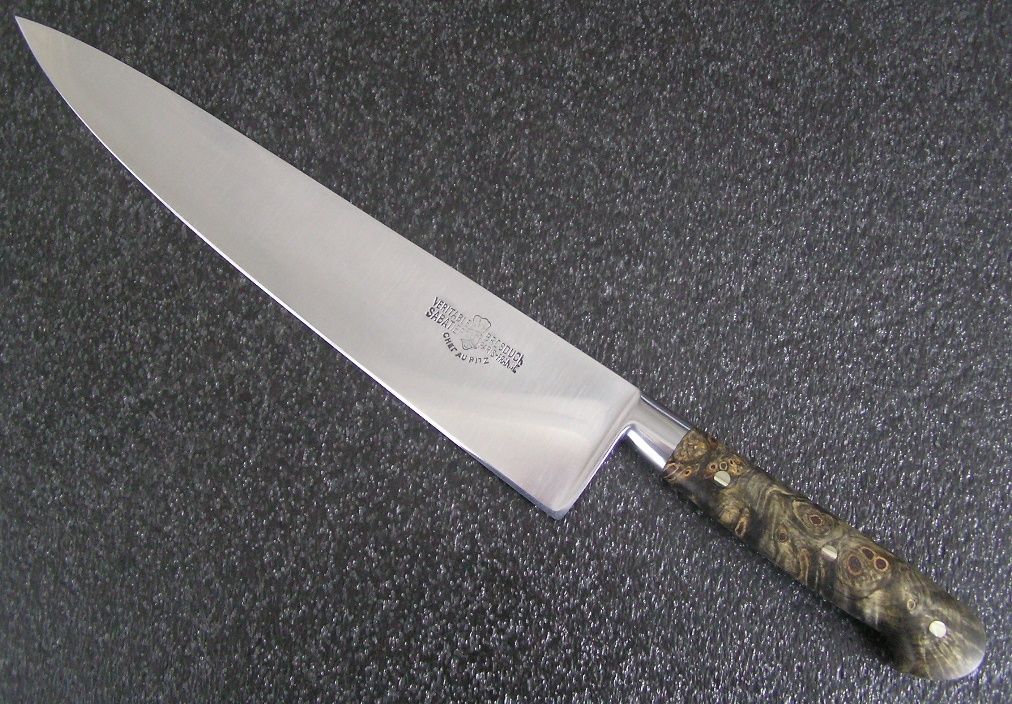
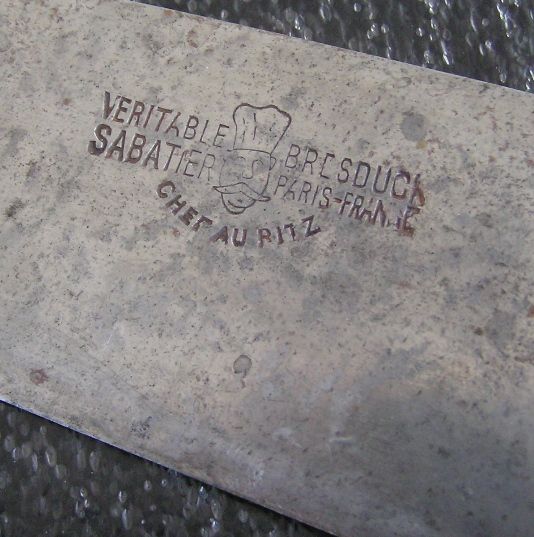
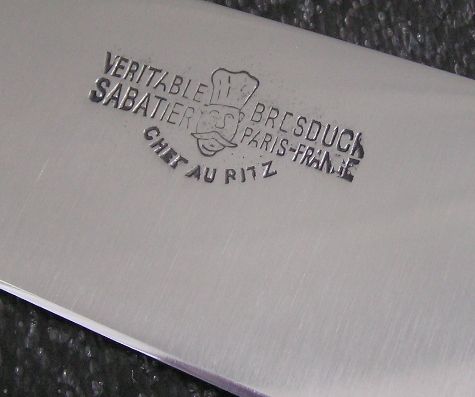
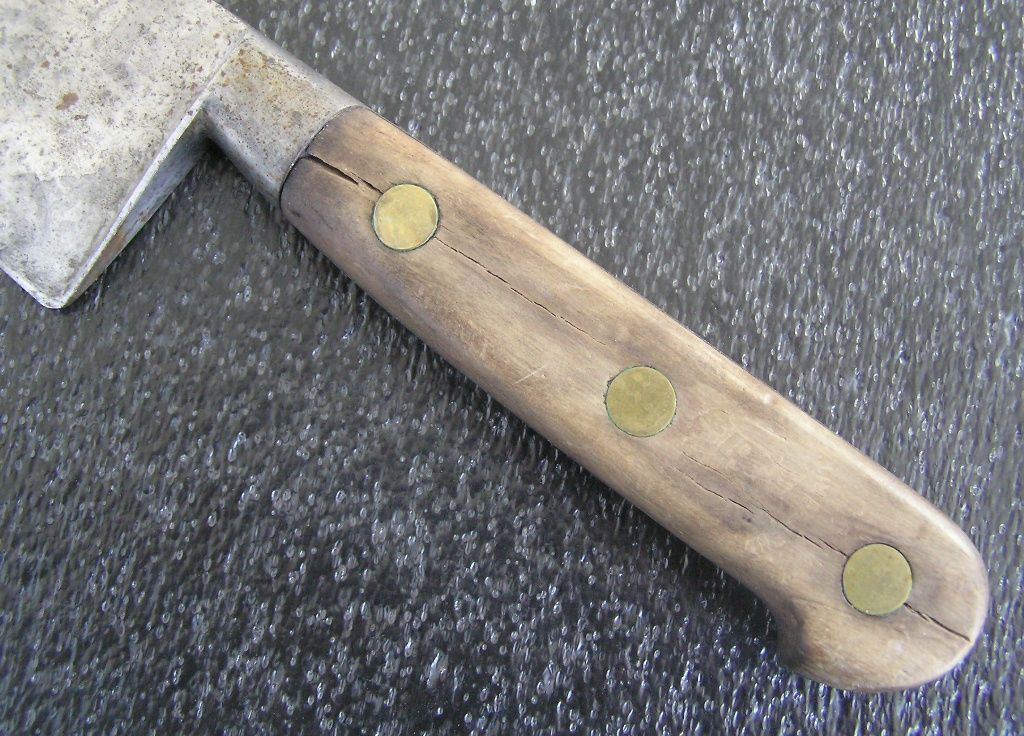
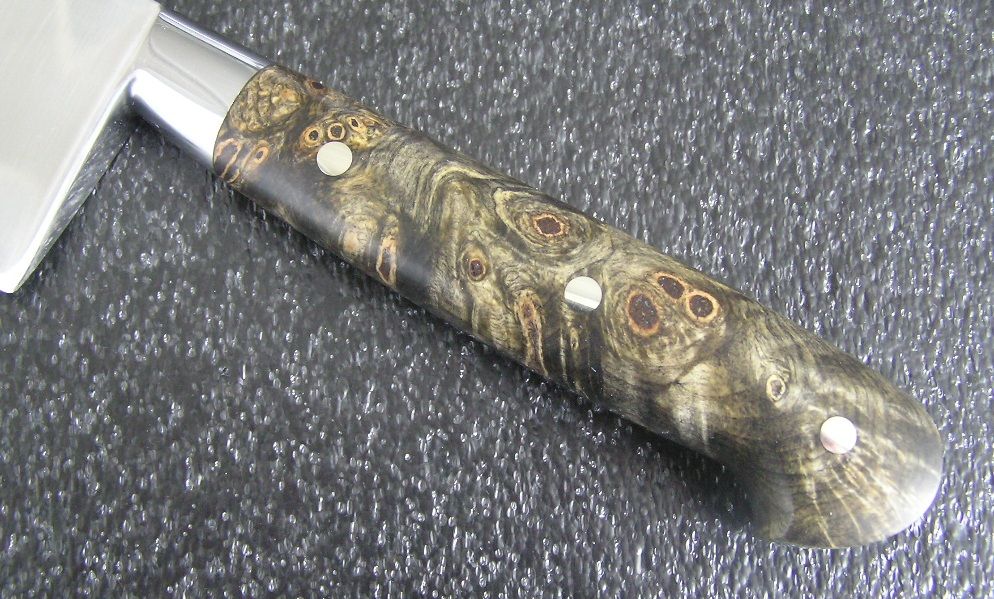
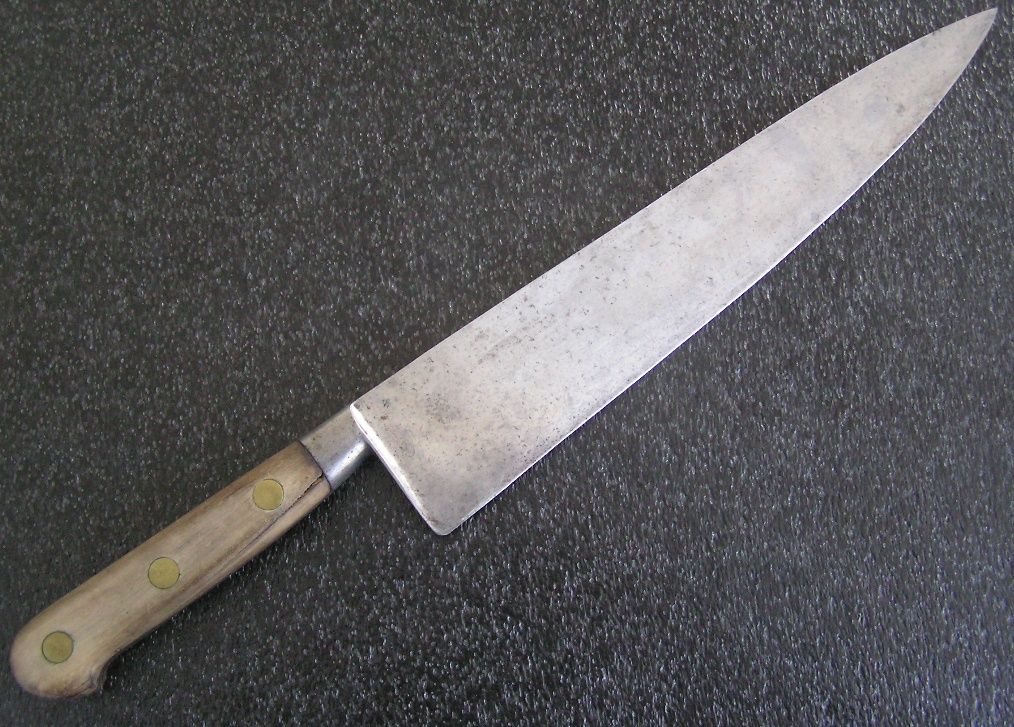
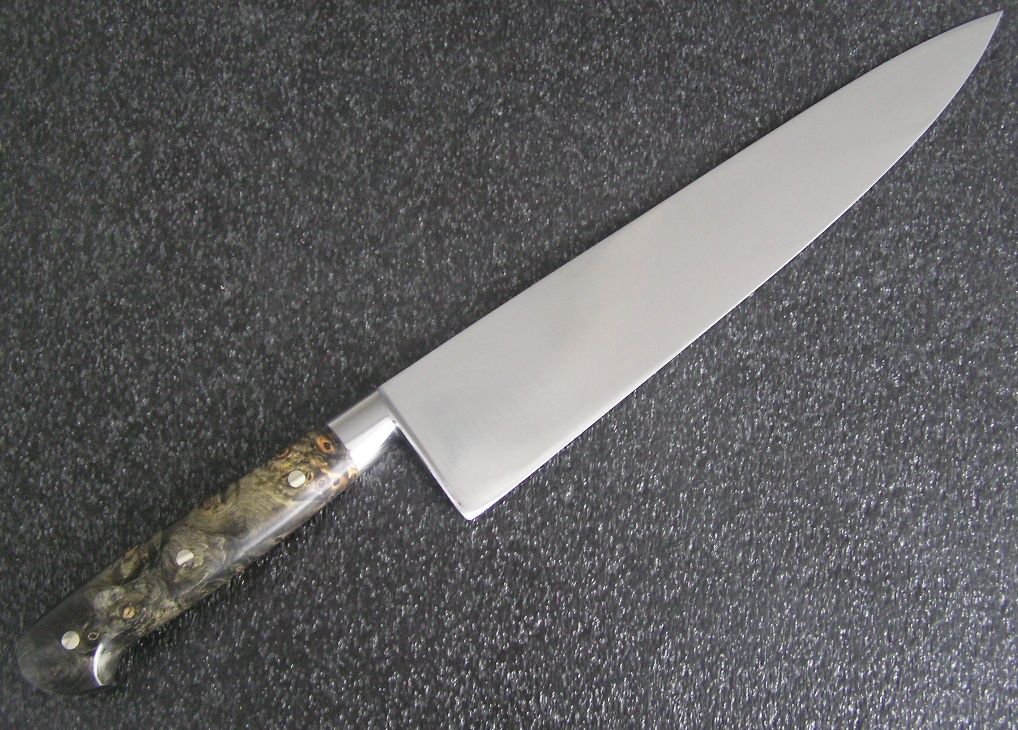
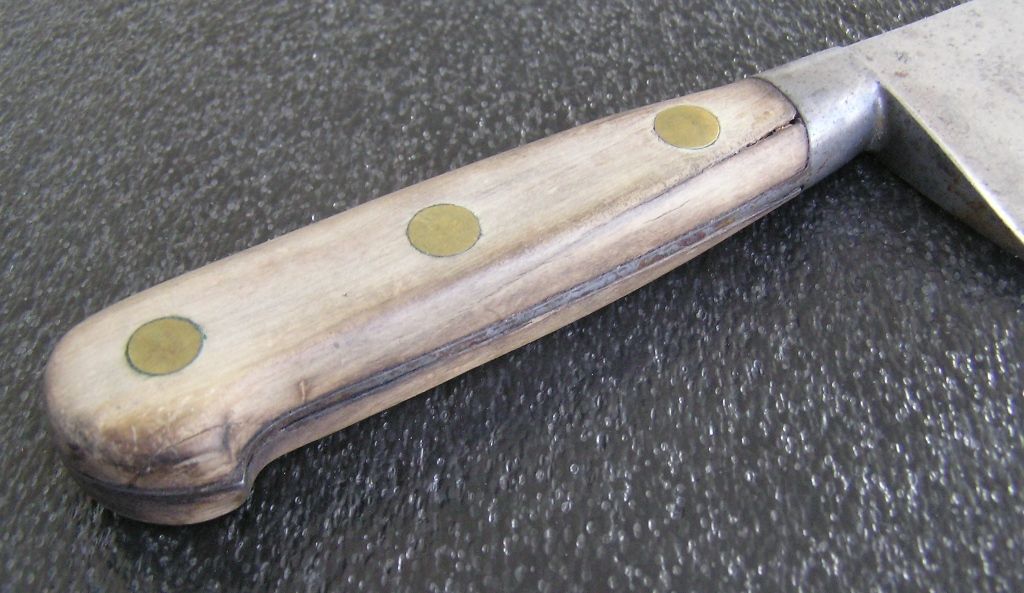
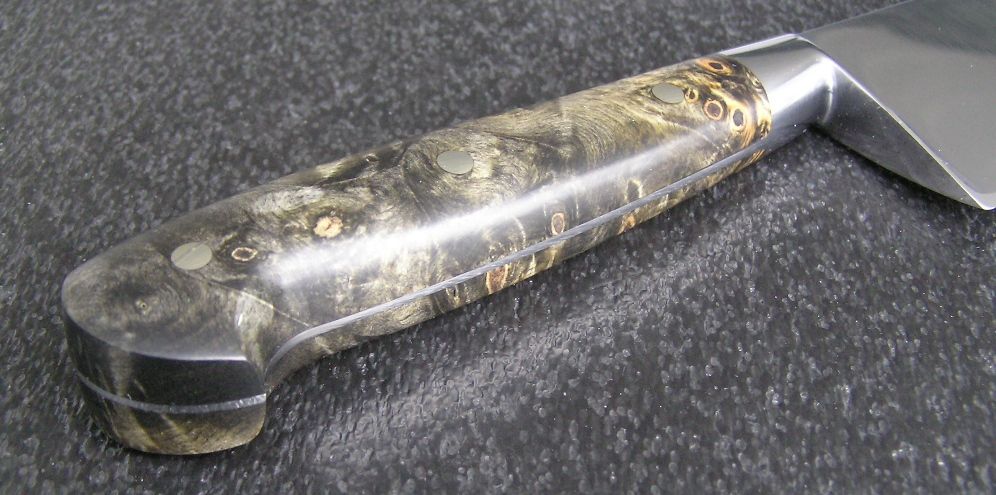
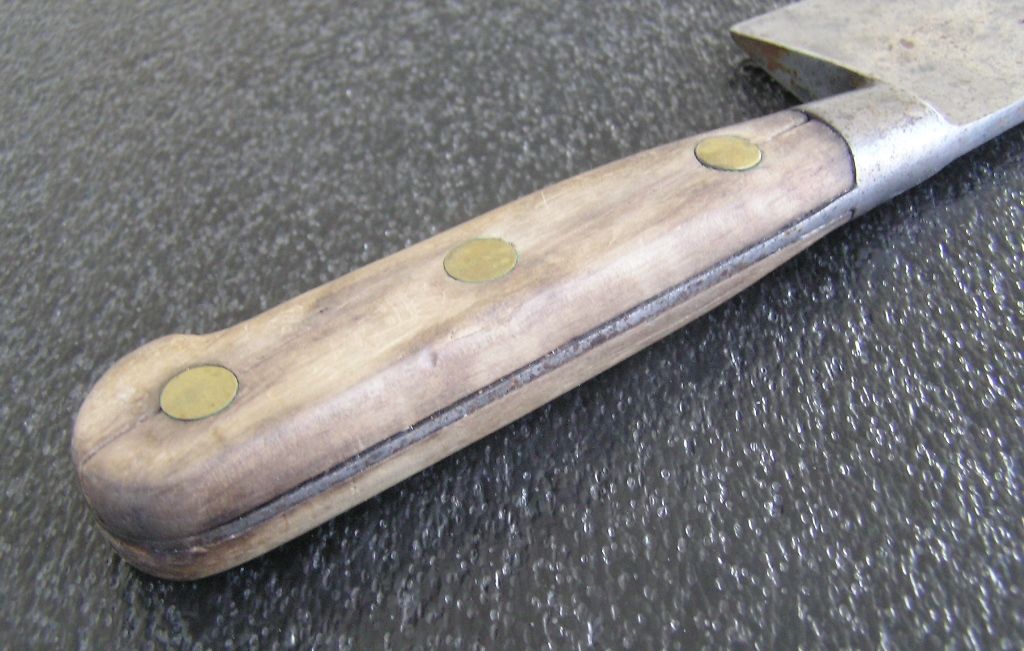
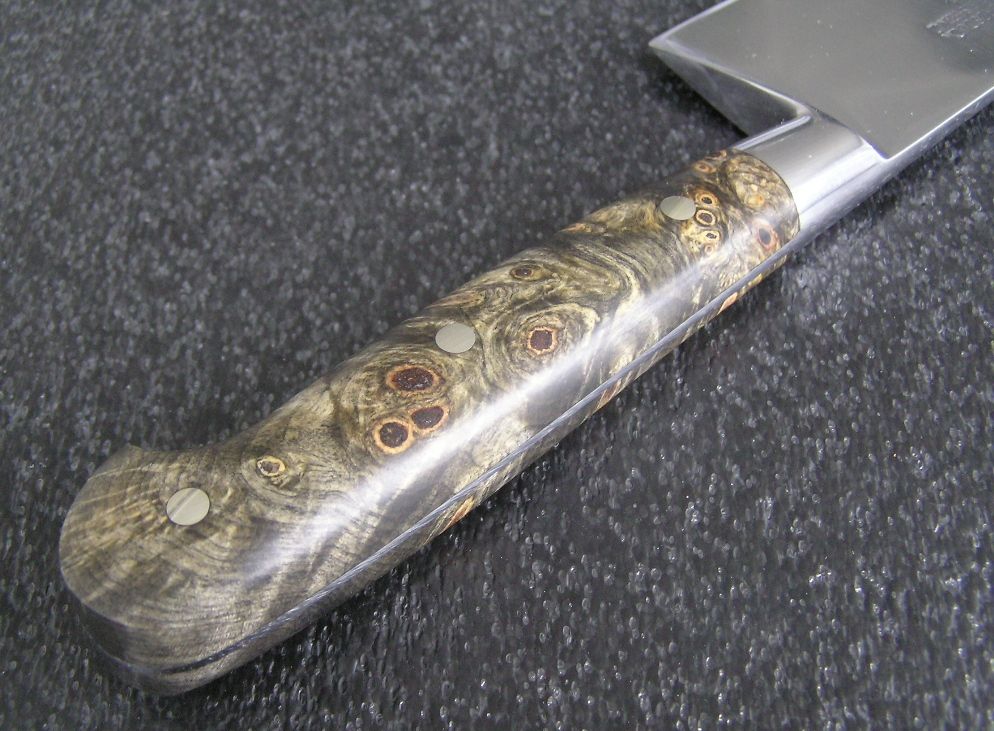
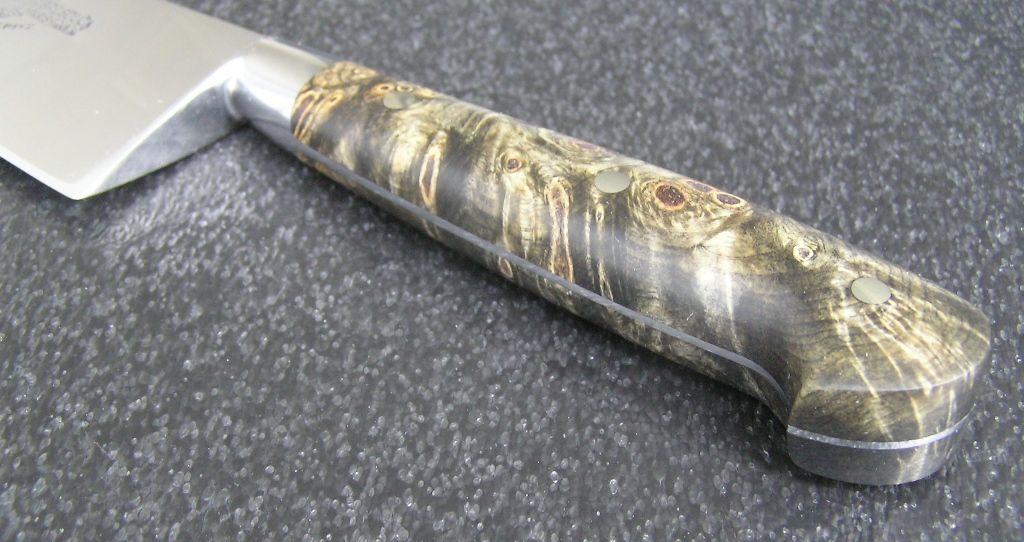
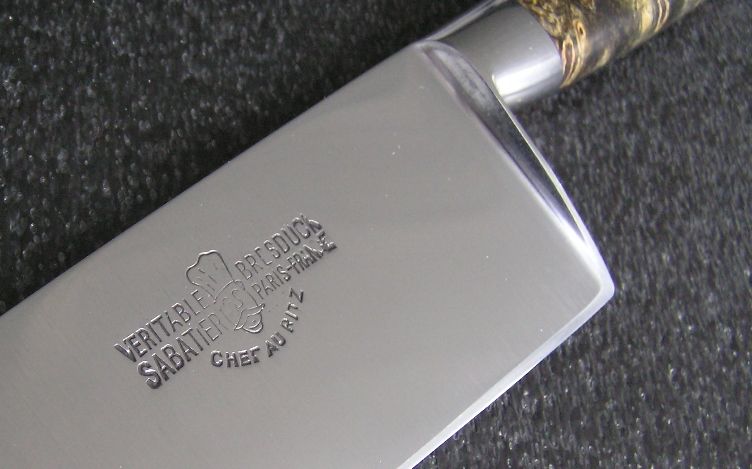
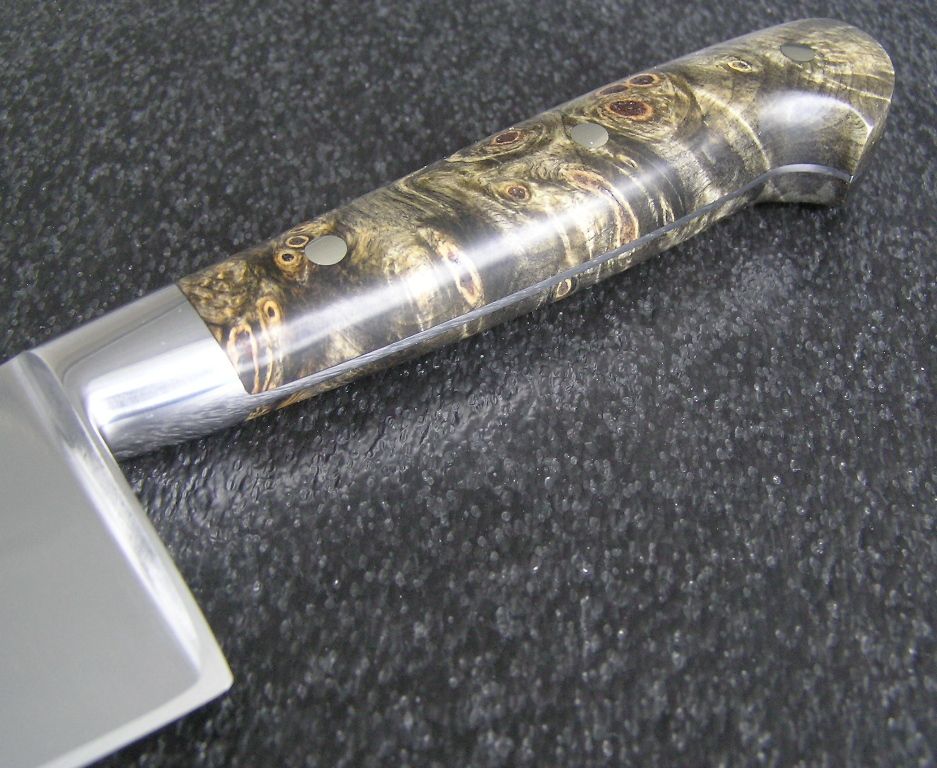
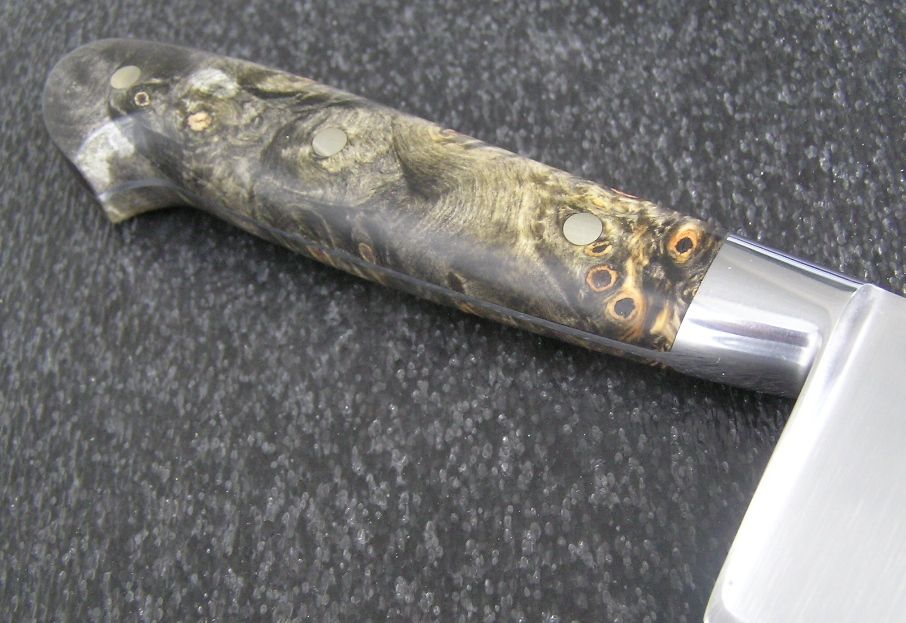
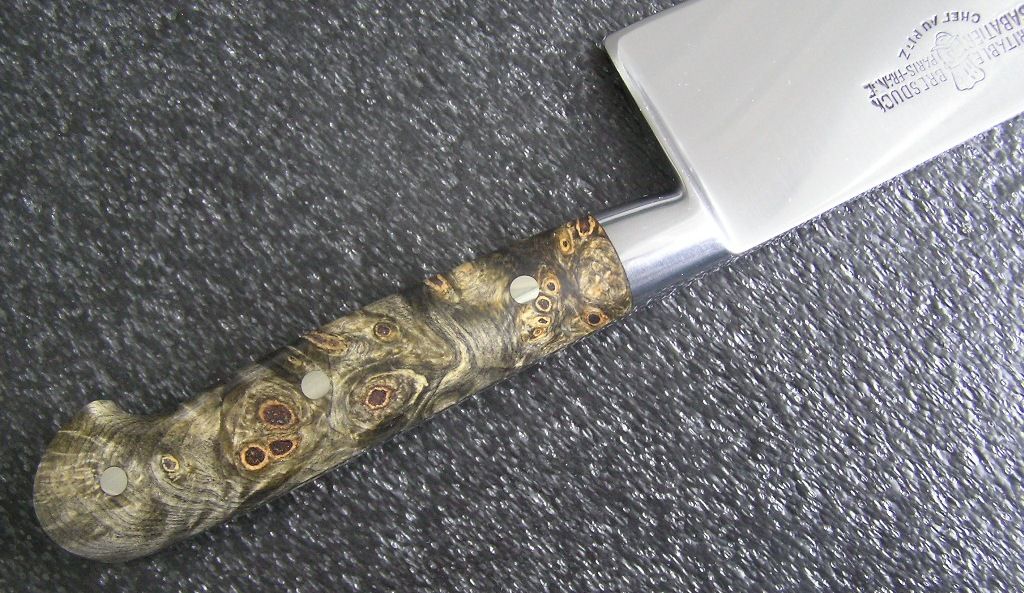
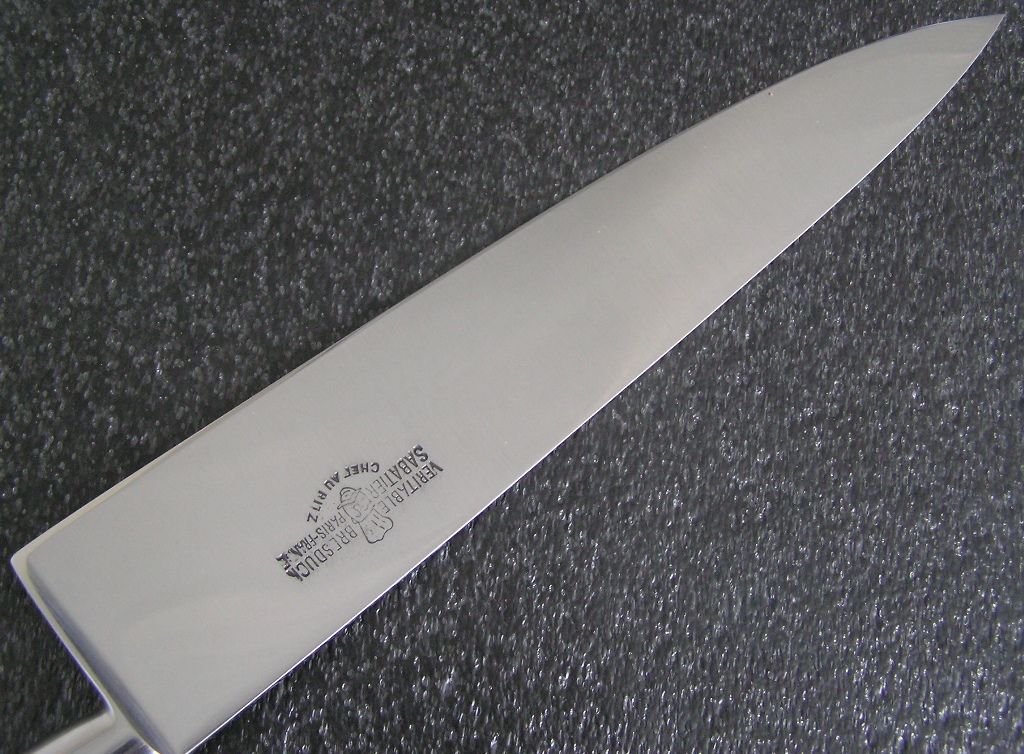
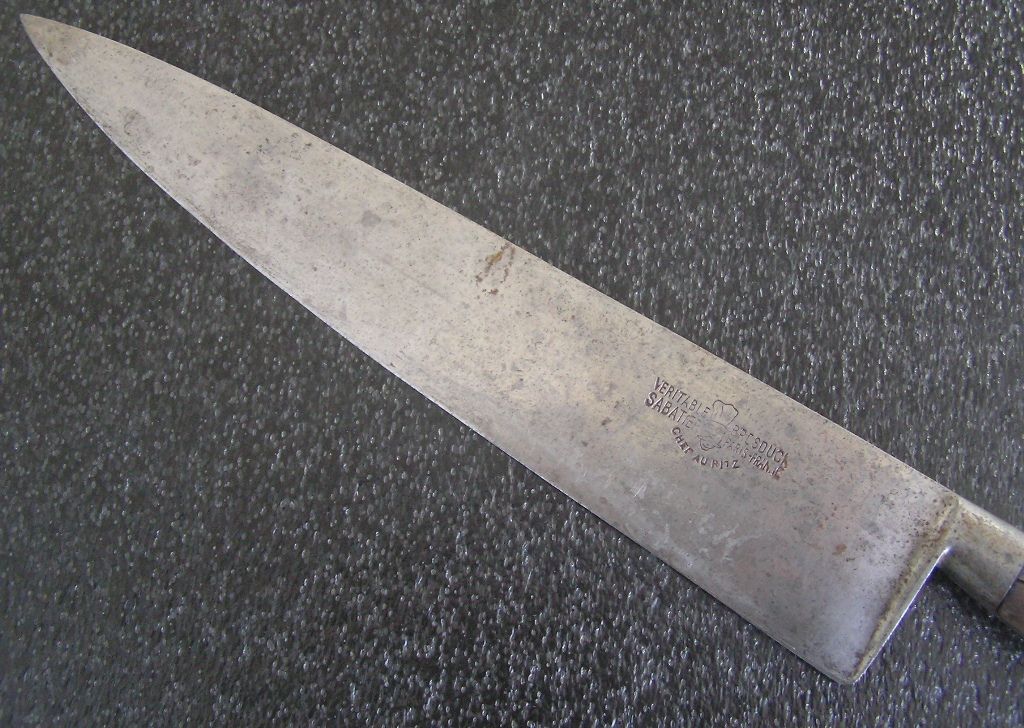
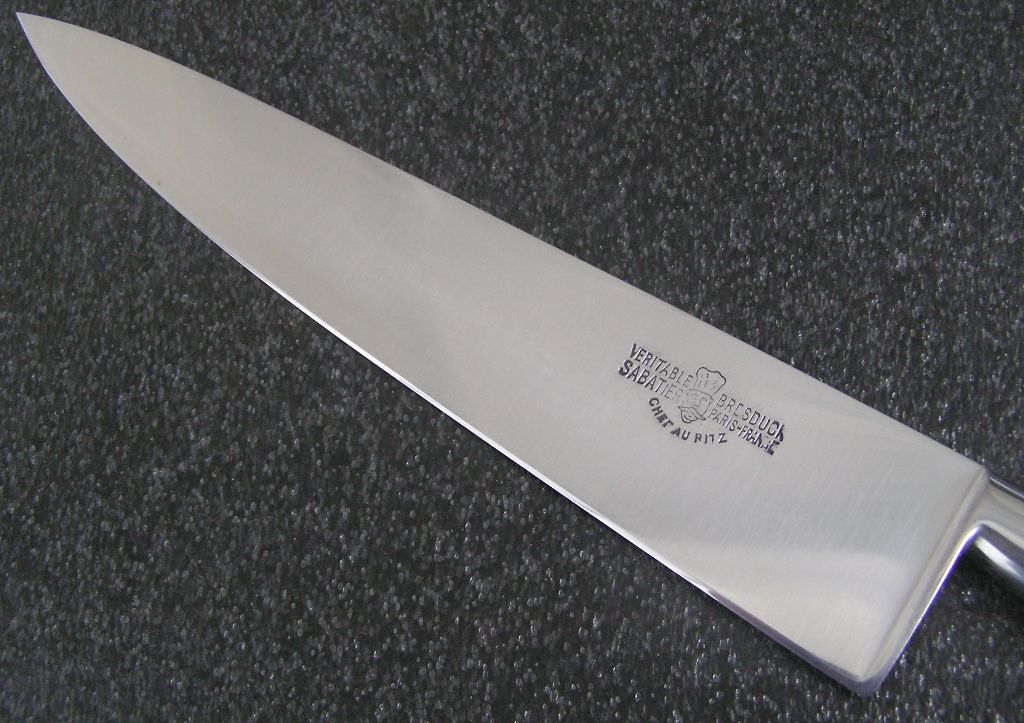
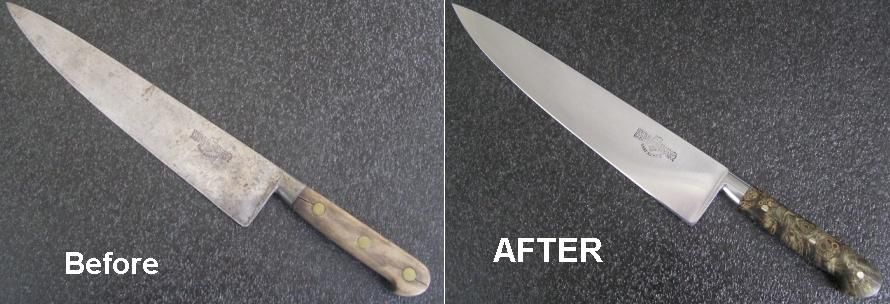
Here's a vintage carbon Bresduck Sabatier that's been completely refurbed. 


I started by re-setting the profile where the heel/tang section had been neglected during sharpening, then I removed rust from the blade through grinding and thinned it a bit at the same time, then a new buckeye burl handle was installed (not an easy one at all - the tang and bolster were so whacked!!!), then finished up with an overall polish/clean & sharpen. 


BEFORE

AFTER


BEFORE

AFTER


BEFORE

AFTER


BEFORE

AFTER


BEFORE

AFTER


BEFORE

AFTER


BEFORE

 AFTER


Sunday, March 18, 2012

Asymmetry – The REAL DEAL

When we venture into using Japanese kitchen knives we often find that we’re interested in sharpening our own knives and begin searching for information on this subject. This leads us to research waterstones, sharpening techniques, and the subject of blade asymmetry inevitably comes up. Since this discussion is regarding asymmetry I’ll leave waterstones & techniques for another time.

What is asymmetry? For our discussion purposes (here within this community) we’re referring to how the knife’s blade is forged/ground in uneven amounts from side to side. While it’s the norm to have a blade be perfectly symmetrical in the western world it is uncommon in Japan to find examples of this. In my experience with working with thousands upon thousands of Japanese knives I can confidently state that 99% are asymmetric with the majority being ground favorably for a right handed user.


Common terminology:

100/0 (single bevel) – yanagiba, usuba, etc

90/10 (double bevel) – honesuki, garasuki, etc

80/20 , 70/30, 60/40 (double bevel) – gyuto, nakiri, sujihiki, etc

50/50 (symmetric) – non Japanese knife


Now I won’t go into why these knives are made this way as I’d only be speculating with regards to some of this. I have my theories and I’ve heard a lot of other’s views on this yet none completely convince me to be the true cause so I’ll leave this part of this subject alone. I will tell you very simply how you can deal with asymmetry and how to sharpen an asymmetric knife though.

To that end I first have to point out that you’re sure to stumble upon some information (I call them myths), while doing your research, that somewhat contradicts what I’ll be talking about here,  stating that Japanese knives are ground or can be sharpened symmetrically (50/50) - I call BS on this. Also, you will see it stated that it is not required to change the angle of the sharpening stone arm when using guided (assisted) sharpening devices (like the EdgePro) and again I call BS on this.

I suggest that you consider the sources that you discover this information coming from as when I’ve done so I’ve discovered that in 99% of these cases I find that it is a Japanese knife retailer or a distributor of guided sharpening devices (and proprietary accessories like stones, etc) that make these claims. I believe that the reason for this is simple – they do not want you to know the REAL DEAL with asymmetry because if you were to know about it you would be questioning them on the proper ways to sharpen these knives (which is not an easy question to answer) and in the case of the guided devices you would come to the realization that they are more complicated to use on asymmetric knives – blades that they were never meant to originally deal with.


Here’s the REAL DEAL and what you really need to know – stripped of all BS and put in plain simple terms….

If you want your double beveled Japanese knife (which has a blade that has been either forged or ground asymmetrically) to cut straight and wedge less you will sharpen the edge bevels as close to matching the asymmetry of the blade itself. That’s it in a nutshell!


How can you do this? Simple…you look at the blade and mimic it’s asymmetric grind when working it’s edge bevel. I used to use a straight edge laid on the side of the knife to compare side to side and then follow by rough estimating this form while sharpening the edge bevel. Luckily most of you will have a new knife that you’re starting out on and you’ll likely find that this ratio has already been worked into the bevels and all you have to do is follow along.

Now let’s talk more specifically of how to sharpen asymmetric knives….

I always suggest sharpening any knife starting at the top of the current edge bevel (this is what’s referred to as the shoulder of the edge bevel – it’s the transition between edge bevel and blade face) and working your way down (by grinding/polishing/etc) to the cutting edge. Doing this will ensure that you don’t repeat the same angle (since repeatability is bad in sharpening) so that you always thin the edge bevel as it moves upward into the ever increasing thickness of the blade’s cross section.

When sharpening you should be stopping and checking your progress often so as to ensure that you’re on (or hitting) the correct location on the edge bevel. You should never aimlessly grind away steel without stopping and checking as doing so will ensure that you stay on the correct path through making incremental adjustments. If you see that you’re hitting the edge bevel too close to the cutting edge then lower the spine ( which adjusts your angle of attack) to correct and if you’re hitting the edge bevel too high (above the shoulder of the bevel) then raise the spine (by adjusting the angle of attack) to correct.

Notice that I didn’t say that you had to use the same angle on each side of the knife nor did I say that you needed to change the angle for each side of the knife or to make each side different angled than one another?


So let’s take a fairly asymmetric gyuto as an example to work with here, I’ll use the Hiromoto AS series as this is easily a typical asymmetric 70/30 ground blade.

In this first case I will be freehanding (that’s using no sharpening guide or aid) on a waterstone. If I were to select one specific angle (let’s say 15deg - or as close to that as I can guess and hold steady) and just go at it I’ll see a couple of things happen. The first is that I’m not hitting the edge bevel where I want to, and I now regret not stopping to check what I was doing, and that the right side’s (if it’s a right handed knife) edge bevel is much taller than the left side is. So I used the same angle yet the right side’s bevel is taller than the left side’s bevel. Why? Because the blade is ground asymmetrically!

Now I take another untouched Hiromoto AS gyuto out of the box and lay it down on the table of an EdgePro, select an angle (let’s again pick 15deg - or as close to that as this device allows for) and then go at it again. What do we now see? Well we’ll likely have that same feeling that we had when freehanding, about wishing that we had stopped and looked before carrying on, but we also see that the stone hasn’t at all hit the bevel on one side of the knife like it did when free handing. Why is this? Because the blade is ground asymmetrically!

Unlike freehanding, where we adjust the distance between the spine of the knife and the stone’s face for angle approach, we instead (on the EdgePro) laid the knife down on a fixed position table and then swung the stone over the opposite side’s edge bevel. Why does this matter? Because the blade is ground asymmetrically – it’s not the same on both sides!

To revisit the issue of myths, many EdgePro type device retailers will tell you to just pick an angle and grind more from one side than the other or maybe to count strokes (like 7 strokes on this side and 3 on another for 70/30 grinds)…..they state that this will allow for correct asymmetrical ground edges. I respond to this by stating that this is an irresponsible solution to tell people to sharpen their knives this way as I know from my years of experience that this will only lead to an unevenly sharpened knife that steers and wedges while cutting.  

So if you’re using an EdgePro type device and you have to adjust the stone arm’s angle for each side of the knife to properly hit the edge bevel in the correct position then do so. Yes this sucks but this is what you’ve decided to use to sharpen your asymmetric Japanese knives with. If you’re upset with having to do this then tell this to the people who sold you the myth, but sharpen your knives correctly.

Again people, these retailers don’t care if you get it right or not – they care about selling knives and sharpening systems (with those proprietary stones) so if you screw up it doesn’t matter one bit to them.


So let’s summarize….

1. All Japanese knives are asymmetric – the entire blade is asymmetric – not just the edge.

2. Use your mind and your hands to find the ratio of the blade and then mimic this within the sharpening of the cutting edge bevel.

3. Adjust your angle of approach as need be - yes even if using a sharpening aid/device.


      That’s it folks – you now know the REAL DEAL

      Happy sharpening!
      Dave Martell
      Wednesday, February 8, 2012

      How to Care For Your Martell Knives

      Blade Finish - Carbon

      We purposely apply a near mirror level of finish on our carbon Martell knives for a few reasons....

      1. A higher polish means less re-activeness which we hope helps the new owner develop a patina while not destroying their food in the process. Too often carbon knives can kill a dish (or three) as the patina is forming and we want our customers to be able to get past this hurdle.

      2. If the correct polish is applied to the carbon blade the surface texture becomes slick which helps food to release. Quite often we hear people complain that food sticks to their knives after they bring them to a mirror polish (and we agree this happens) but if you use specific compounds to bring the mirror level just below perfect (sort of a near perfect or light haze) you can get the exact opposite effect where food releases better than normal. This is what we aim for.

      3. Nothing is prettier than a mirror polished carbon knife that forms a patina. Take any carbon knife and polish it up and you'll see what I mean between the before and after. In this case we did the polish work so that our customers never have to.

      Now you'll notice that I didn't mention out of the box appearance - that's just a nice side effect of the mirror finishing process. The reasons we do this is for what this level of finish provides specifically for function and aesthetics becoming a secondary compliment.


      Cleaning

      As for cleaning or maintaining the mirror polish of a carbon Martell knife - I wouldn't do this. I would instead use the knife and let it develop it's patina as it comes and enjoy it's beauty as it develops.

      If you use the knife often you need to do nothing special - just wash with warm/hot water, immediately dry, and store. If you have something like 40 gyutos in your rotation and only use it every few months then I suggest coating it with camellia oil between uses, this will keep the rust at bay.

      *A nice tip I can give regarding the forming of a base patina is to sacrifice an onion which will turn the knife brown/golden mottled - wash/dry - then cut some cooked beef and give the warm juices a minute to do their thing before rinsing off. The beef will turn the blade blue/purple which is very beautiful. Raw beef and chicken can also add some level of blue to the blade as well. You'll see a basic pattern form that will pretty much stay put unless you do something nutty like cut 40lbs of tomatoes or something like that as that'll wipe away some of the formed patina.


      Handles

      In most cases we are using exotic hardwoods that have been stabilized. These woods should remain somewhat stable through normal use but can use some TLC to help keep them pretty and in tact. I suggest using a combination of mineral oil/beeswax as you see fit. The more the handle is washed the more you may want to apply some protection.

      For our carbon western full tang knives you will note that the exposed tang will patina with use and this is normal but the tang should be cared for the same as the blade is or it may rust.

      For nickel silver & copper pins you can chose to allow the pins to patina or to wipe them clean to keep them shiny - this is up to you based on your tastes.


      Sharpening & Honing

      Martell knives have very thin edges sharpened (new) somewhere in the neighborhood of 8-10 deg (per side). Our knives have the bevels set using waterstones and then finish sharpened using belts so that our customers can easily find the bevel with no extra grinding work required. Martell knives are not knives that come with built in sharpening problems - they are ready to go to the stones when the time comes.

      For in between sharpening sessions we suggest the use of a strop, be it felt pad or leather pad charged with a fine diamond compound. See our line of strops & compounds for what we recommend for use on our knives.

      *If sharpening knives isn't your thing then that's OK since Martell knives come with FREE Lifetime Sharpening. Just send them in to us and we'll get them back to like new edges. 


      Storage

      This is something that you'll have to decide for yourself - maybe a magnetic knife rack, a counter storage block, or even the supplied padded case will be fine but please don't throw one of our knives in a draw with other items and expect it not to be damaged as this won't be the case. Fine knives and junk drawers don't mix well.


      If cared for properly your Martell knife should last you for a lifetime. If you have any questions on the care or storage of our knives please feel free to ask.


      Thanks for your business! 

      Dave Martell

      Thursday, January 26, 2012

      How To - Attaching a Sharpening Stone to a Base

      If you sharpen knives and have stones sooner or later you'll likely want to mount a stone to a base of some sort. You may have a favorite stone that you've worn down so thin that you're sure it'll crack the next time you use it, or you have a stone that has cracked or is known to be cracklicious, could be you simply prefer mounted stones for the added height and knuckle clearance afforded, or maybe you have a mounted stone that has come loose from it's base and needs attaching.

      Whatever the case may be you will probably tackle the job pretty much the same way, you'll select your base substrate and get to gluing.

      Below I put together a quick & dirty tutorial on a couple of things that I found to be helpful tips to success when attaching a sharpening stone to a base.

      The first thing to consider is the base material to be used. I'm old school & prefer wood like cypress as this is traditional. While wood is OK for non-soaking stones you might be better served with something a bit more stable for stone requiring some extended stay in the pond before use. Maybe something like granite, marble, glass, tile (etc) would lend themselves to the task of long soaks better than wood.


      In the below tutorial I'm showing a natural stone that has come loose from it's factory mounted base & needs to get some repair time on the bench. In this case we have an uneven natural stone bottom and hunks of epoxy to deal with.


      I decided to use my disc grinder to clean up the stone & base because it makes things go real fast - real quick. You could use a wide belt grinder or even some sandpaper if you had too, although myself, I'd rather buy a new stone than use the sandpaper method.


      Now you should have both base & stone reasonably flat. As you can see on this natural stone there are depressions remaining after cleaning it up and that's OK because the bottom only needs to be "flat enough", it doesn't need to be engineers dead ass flat for this to work. Plus, these little depressions will hold more epoxy which can't be a bad thing, right?


      This part is important - selecting the correct epoxy. I can tell you from experience that water resistant does not equal water proof in the world of epoxy. I suggest going with a waterproof epoxy since you'll be using these stones in water....duh! I used System Three's T-88 because that's what I have the most of on hand but you don't need to special order such expensive epoxy just for this task, head on over to your hardware store and grab some Devcon 2-Ton - that's waterproof - and it's cheap and easily found.


      I like a rough surface on both stone & base so I do nothing but clean the surfaces with alcohol prior to glue up. Make sure that both surfaces are completely dry before applying the epoxy.


      Now it's done and after the required cure time the stone will be back in service.


      Wednesday, November 30, 2011

      Murray Carter Damascus Neck Knife is Copperized

      Here's a weird project that a friend tasked me to try. He sent me one of his Murray Carter damascus neck knives and requested that I etch it with copper. I gladly accepted the challenge because when else would I get to try this, not many people are willing to fork over such a pricey knife for an experiment.

      Here's the results...


      Pretty crazy, huh?


      Friday, October 7, 2011

      Western (Yo) to Eastern (Wa) Handle Conversion

      Besides our normal sharpening service and making custom knives we also do all sorts of upgrades & reconfiguration work as well. One such example is this Misono Swedish Steel (carbon) Dragon Sujihiki that we converted from a western handle to a wa handle.

      The handle we installed is HI Cook Pine & streaked buffalo made by Stefan Keller of JapaneseHandles.com

      BEFORE


      AFTER


      Friday, January 21, 2011